Are you someone who wants to create screen recordings, but you feel intimidated by all the technical jargon and complicated software options out there? Fear not! In this beginner’s guide, I will break down the process of screen recording into simple steps to get you started, regardless of your technical expertise.
What is Screen Recording?
Screen recording is a process in which a software program captures anything happening on your computer screen. While you can simply record your screen using your phone for personal use, to create a professional quality screen capture to edit and/or share with others, a simple screen recording software will be the way to go. If you want to create tutorials, record game play, record/document a video or other online information, or simply record a video call, screen recording can help you easily gather information to save or share with others in a visual and engaging way.
Choosing the Right Software
One of the first steps in starting your screen recording journey is choosing the right software. For non-techy individuals, it is important to opt for user-friendly and intuitive software that doesn’t require a steep learning curve. In choosing a screen recording program, consider the system compatibility, video length limits, ease of use, tutorials available, as well as the cost.
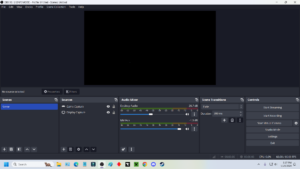
I have used OBS (Open Broadcaster Software) Studio for the past 4 years. As a non-techy, it looked intimidating at first, but it is very intuitive to use. Not to mention, since it is highly used and highly recommended, there are a lot of tutorials online that are incredibly helpful. It is free to download and use, no strings attached, no limits, and no restrictions. It performs both the simple functions that I need, as well as many advanced features that I have not ventured into. While I do not intend to endorse or advertise OBS Studios in this blog post, it is the only program that I have used and I am sharing my personal, in depth experience.
Regardless of the screen recording software that you choose, this guide will help you get started on your journey.
Setting Up Your Screen Recording
Once you have downloaded your software, it’s time to set up your screen recording. Here are some tips to help you get started:
Select the area to record: Decide whether you want to record the entire screen or just a specific area. Recording a specific area can help lessen the editing time and focus directly on the images and information that you want to showcase. If you want to record your entire screen, consider cleaning up your desktop icons and choosing a clean, professional looking desktop wallpaper. Avoid cluttered backgrounds and irrelevant info that may distract your viewers.
Adjust the recording settings: By fine-tuning these settings, you can ensure that your screen recording captures the desired visual and audio elements effectively.
-
- Resolution: Select a resolution that balances quality and file size. Higher resolutions offer better clarity but will likely result in larger file sizes.
- Frame Rate: Adjust the frame rate based on the motion in your recording. Higher frame rates are ideal for capturing fast-paced action, while lower frame rates work well for static content.
- Audio Quality: Opt for a higher audio quality setting if clear sound is important. Consider the balance between audio file size and quality.
Author note: OBS Studios gives you recommendations of settings based on your computer settings and the type of video you are recording. I have had great success relying fully on those recommended settings.
Check your microphone and/or system audio: Before starting your screen recording, ensure your microphone is properly connected and functioning. Test it by recording a short audio clip and playing it back to check for any issues. Additionally, check your computer audio settings to make sure the sound is being captured correctly. Adjust the volume levels as needed to ensure that both your microphone and computer audio are clear and balanced during the recording process.
Choose the save file destination: When selecting a file destination for your screen recording, consider choosing a location that is easily accessible and organized. Opt for a folder on your desktop or a specific directory where you can quickly locate your recordings. Avoid saving files in temporary locations or cluttered folders to prevent them from getting lost or mixed up with other files. A well-organized file destination will make it easier for you to find and manage your screen recordings efficiently.
Test it All Before the Final Production
Do a practice recording with all potential voice fluctuations, screen changes, movements of the mouse, etc. that you can. Save the test file and then go back and watch the practice recording so you can see what will actually display and you can hear what it will sound like. Many people will buy a simple pop filter for their mic to help record clearer audio. By reducing plosive sounds like “p” and “b,” it helps prevent distortion and ensures a smoother sound, increasing overall sound quality.
Conclusion
You do not need to be a tech genius to get started with screen recording. Start small and learn just enough to complete your first project. It’s too easy to go down the information rabbit hole with tutorials and technical information that will leave you frustrated and overwhelmed. By keeping it simple and gradually learning as you go, you can build confidence step by step. Begin with basic recording techniques and then slowly explore more advanced features. This approach allows for a smoother learning curve and a more enjoyable experience overall.
About the author: I am 98% non-techy, yet I have been a successful Youtuber hobbyist for the past 4 years. I record game play and narrate as I play, capturing both my voice narration and the game audio sounds. I use a separate editing software (not OBS) to cut and paste, highlighting the best gameplay and editing out the uninteresting parts. My longest recording was 4.75 hours, which I edited down to a 40 minute video.